Figma plugin
Jumpstart your software localization journey right from the design phase with Translized’s Figma plugin. This tool empowers you to integrate translations directly into your UI designs within Figma. You can also upload your translation terms from Figma into Translized, streamlining your workflow and ensuring timely completion of the localization process (leveraging both human and machine translation).
Avoid common pitfalls like translations disrupting your UI layout. Provide your translators with the context they need through integrated screenshots.
- Figma plugin is available from Starter plan.
- Uploading screenshots form Figma is available from Premium plan.
Features
- Easy Translation Uploads: Transfer your translation terms from Figma straight to Translized.
- Live UI Visualization: See your translations come to life within your Figma UI designs.
- Contextual Clarity for Translators: Enhance translation accuracy with context-providing screen uploads.
- Consistent Naming Conventions: Establish key names for your translation terms, bridging your copy, design, and code seamlessly.
How it works
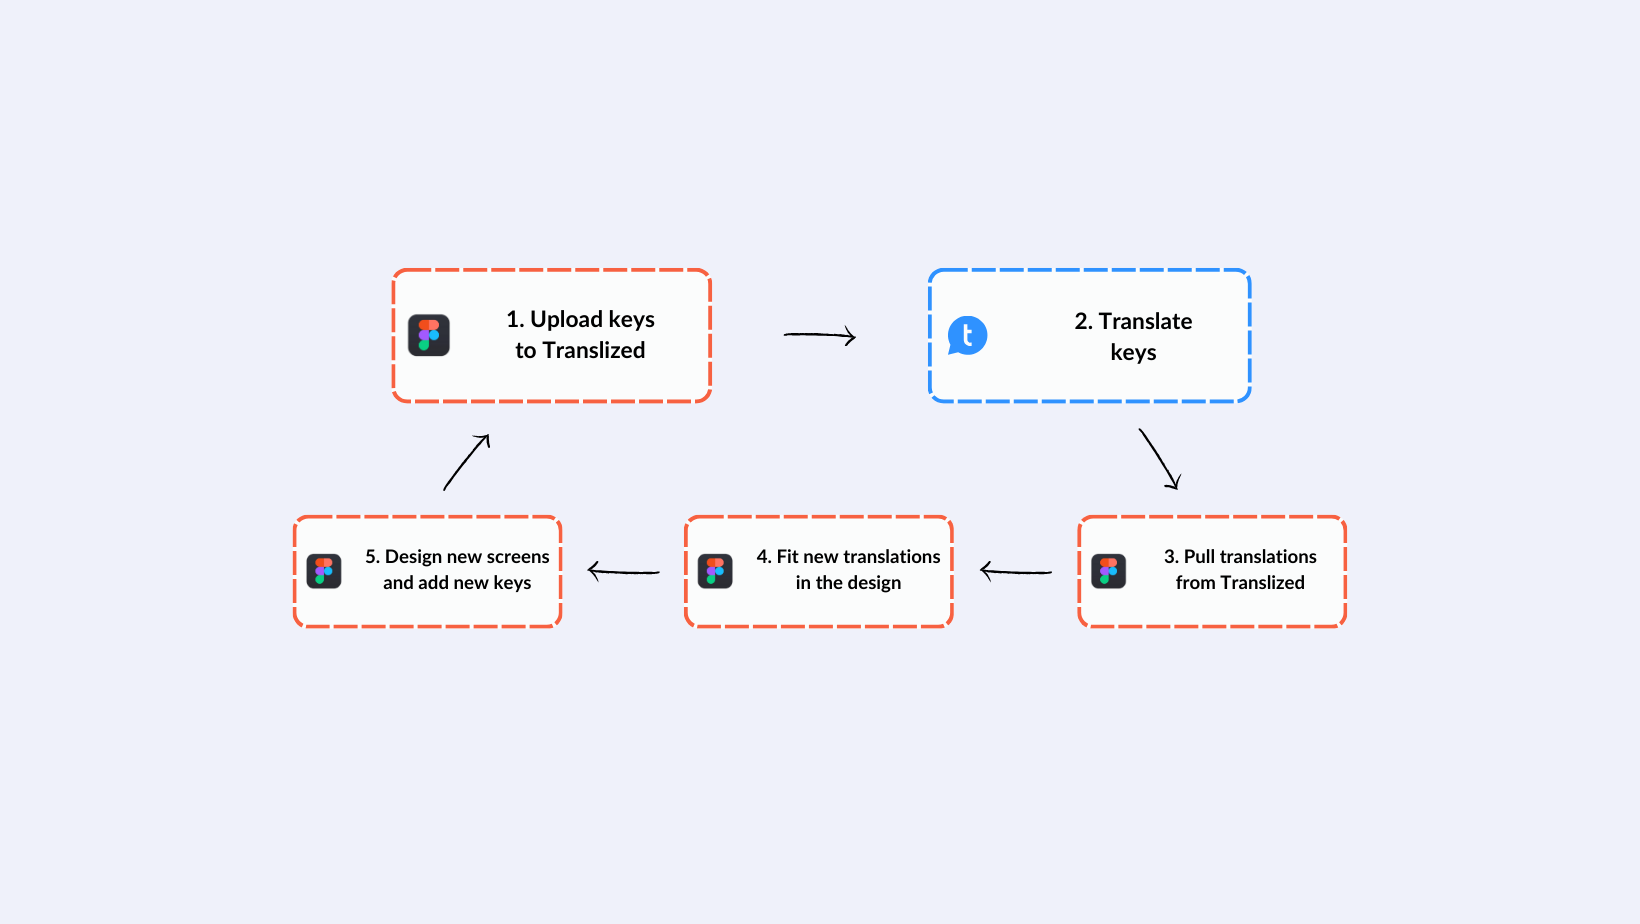
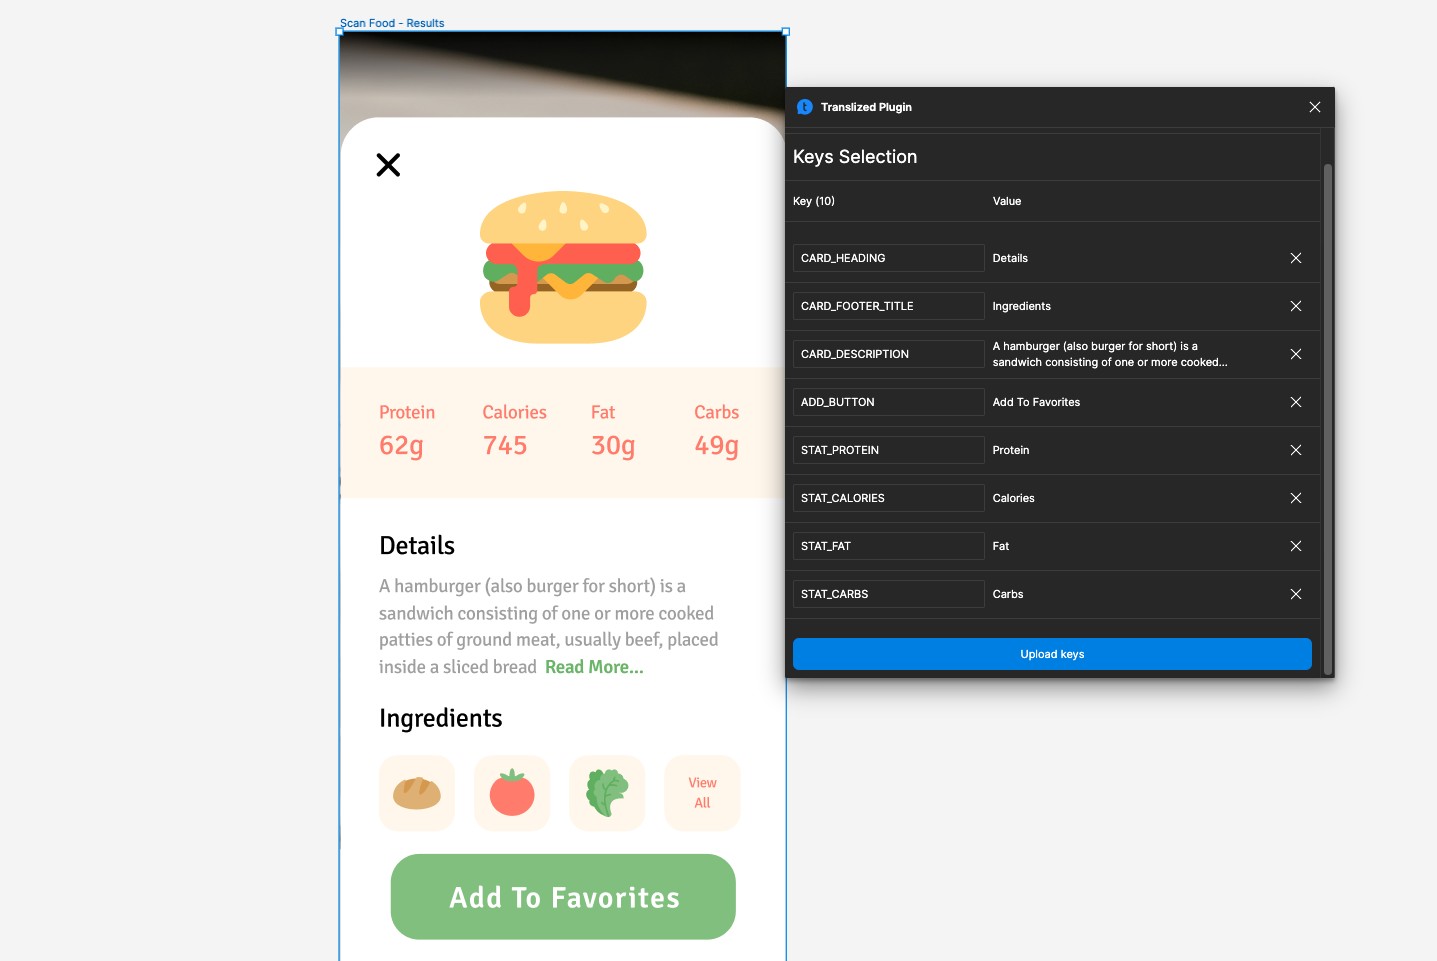
1. Upload keys to Translized
1.1 Select keys on the page
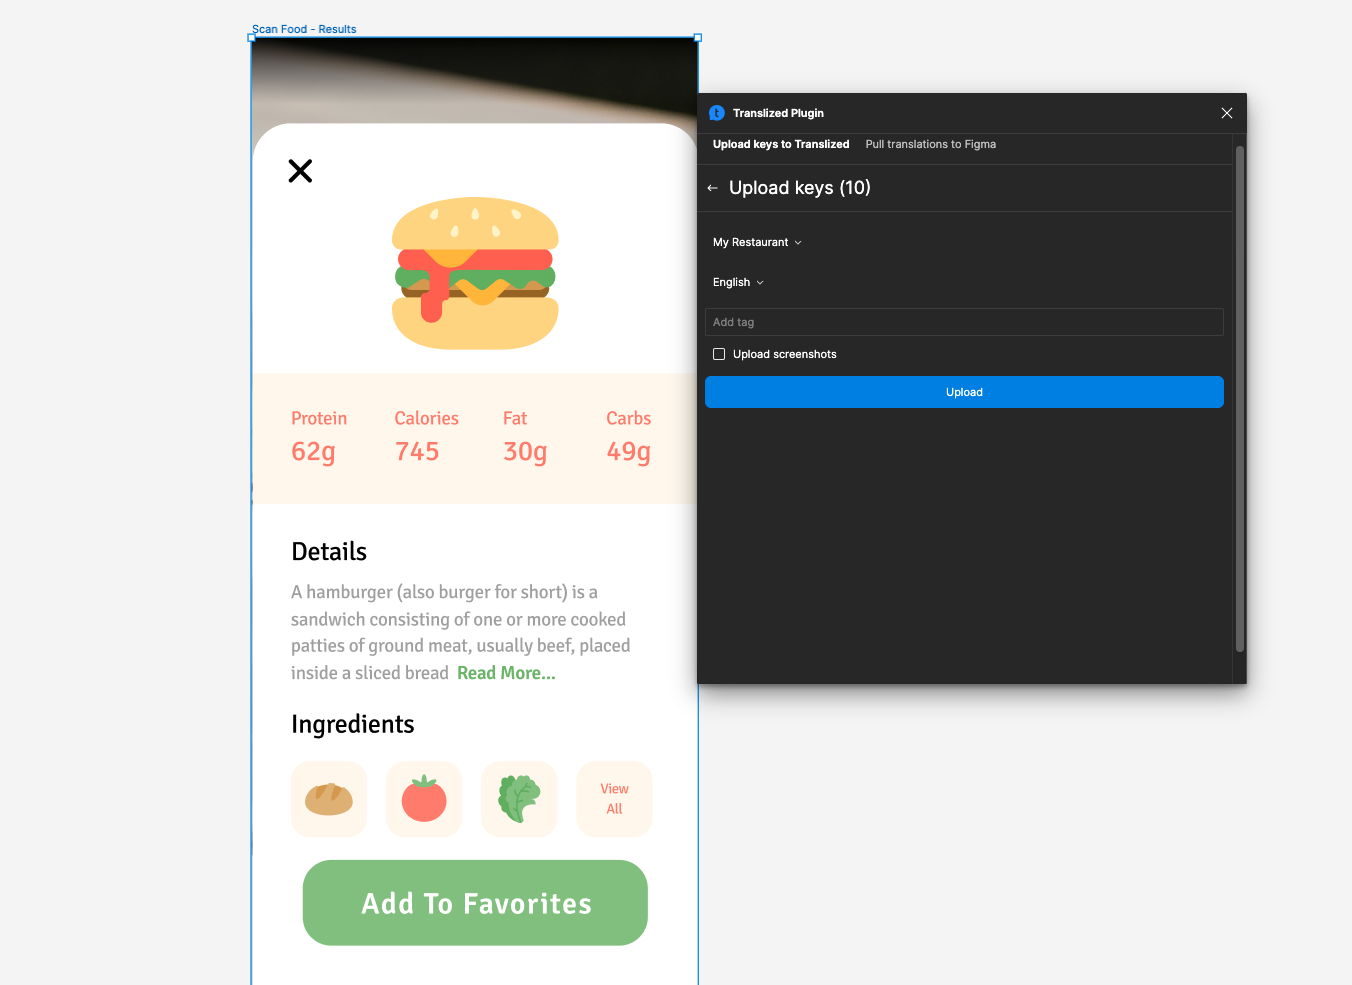
1.2 Select project and language that you want to upload keys to
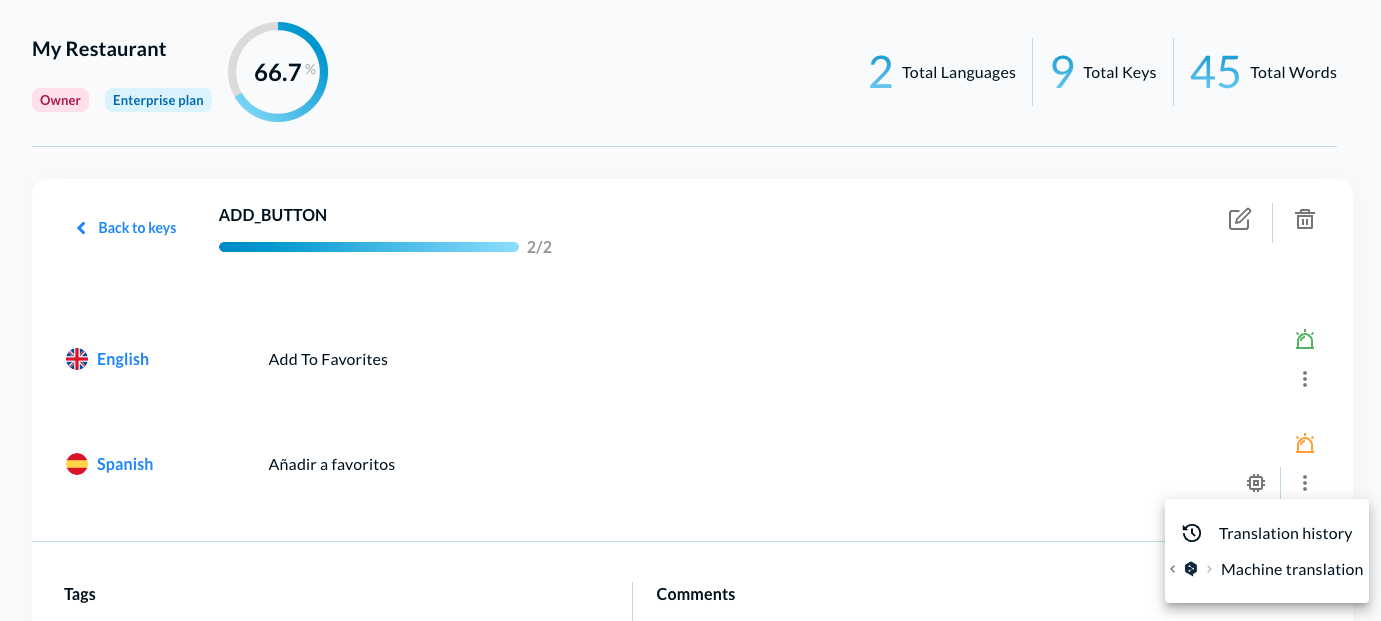
2. Translate keys
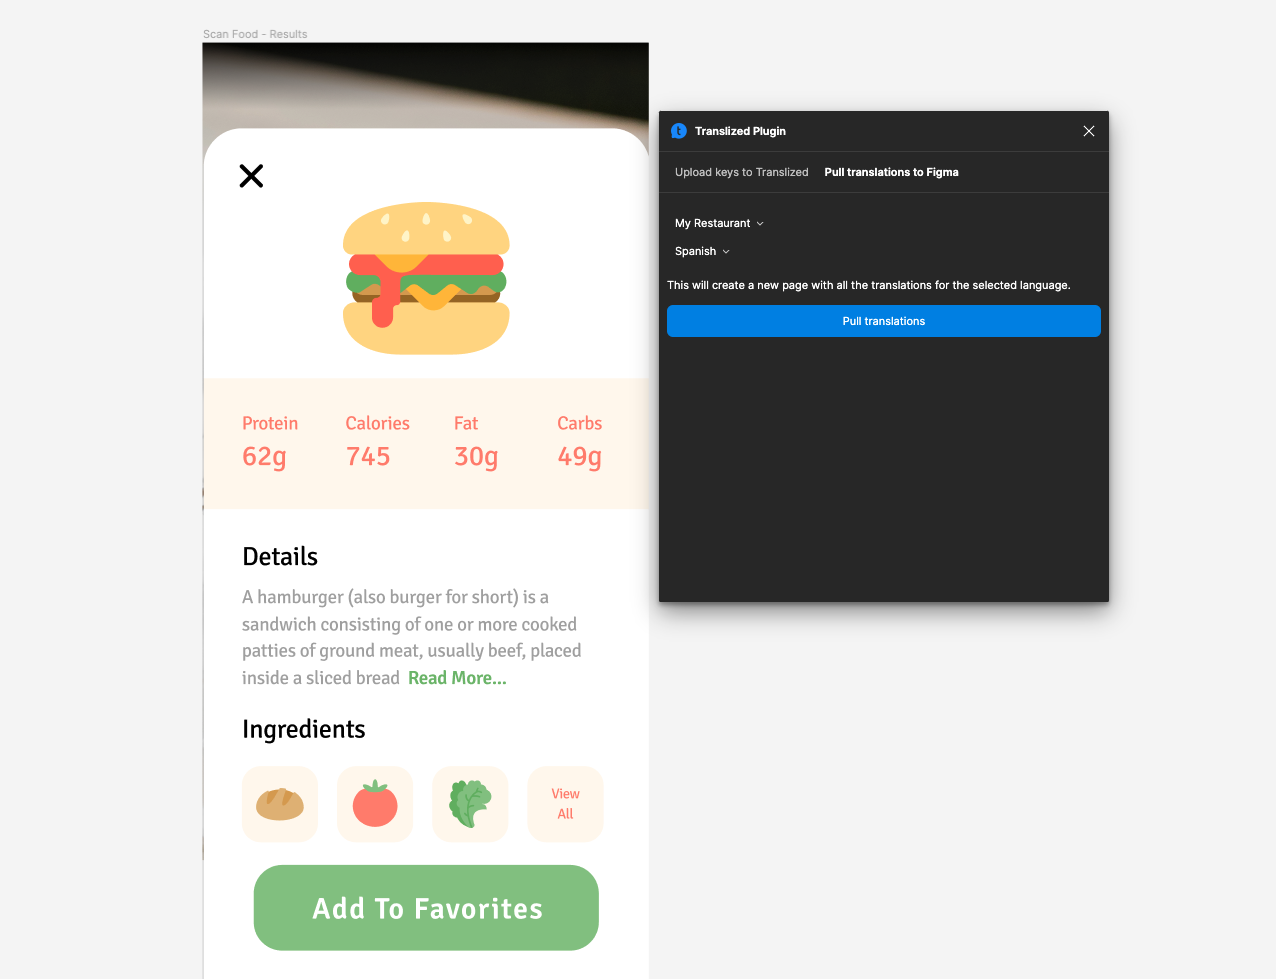
3. Pull translations from Translized
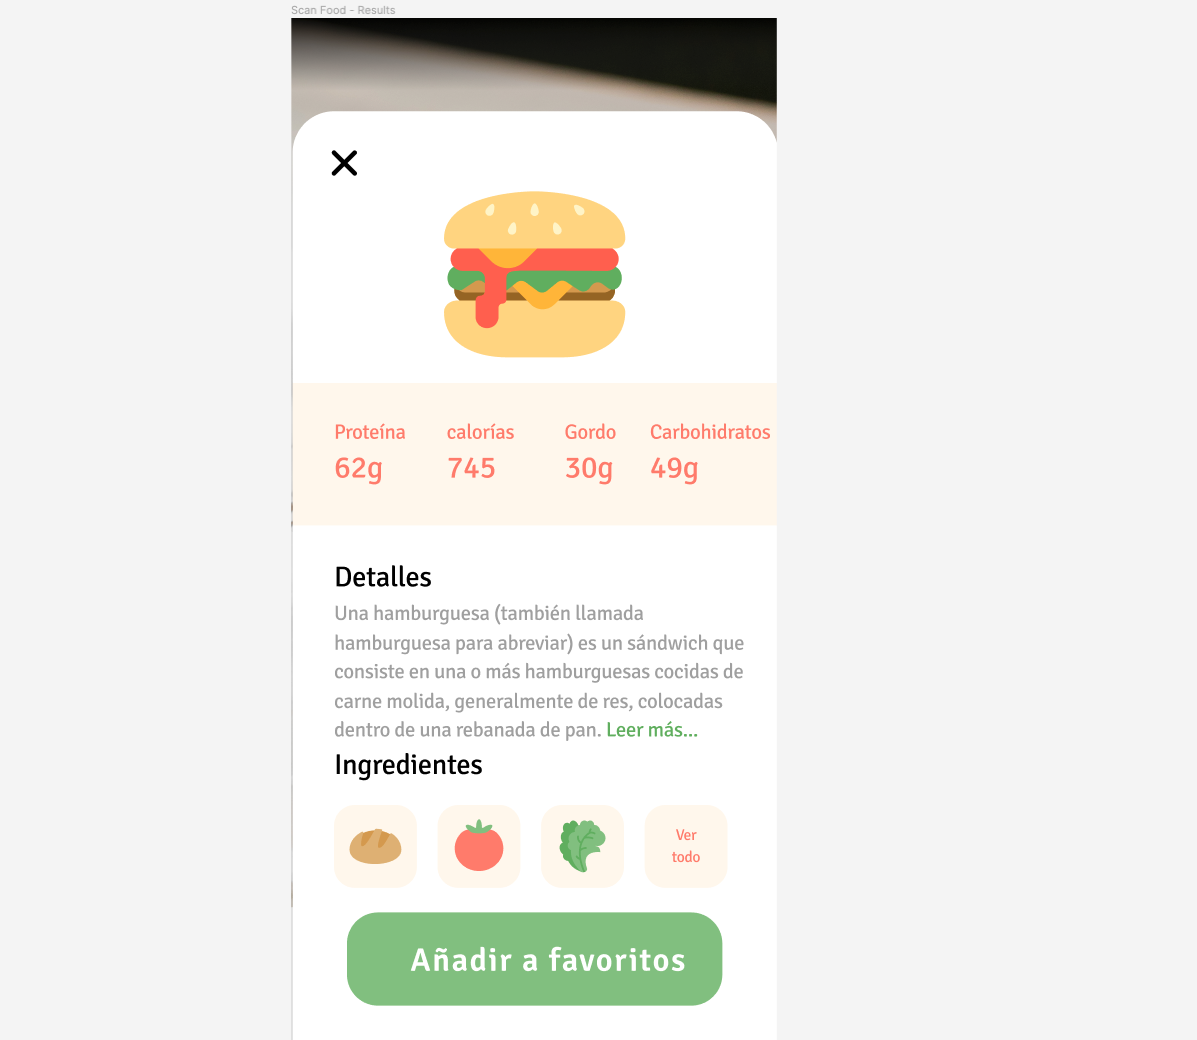
4. Fit new translations in the design
5. Design new screens and add new keys
Now you can design new screens and add new keys to the design. When you are ready to translate new keys and to see how those translations apply to the design, you can repeat the steps above.
Getting Started with Translized Figma plugin
- Open Your Project in Figma
- Install the Plugin: Head over to the Plugins section and install the Translized plugin.
- Link Your Account: Provide your API Access Token (found under Account/API Access) to link your Translized account. If you don’t have an account yet, sign up for free at translized.com.
- Prepare Your Texts: In Figma, select your texts. Check and modify key names as needed, and then upload them to Translized.
- Select Project and Language: Finalize your upload by choosing the appropriate project and language.
- Upload Screenshots: (Available on the Premium plan) Ensure to check ‘Upload screenshots’ for added context in translations.
- Translate on Translized: Utilize machine translation, professional human translation services, or manually translate your content on the Translized platform.
- Pull Translations into Figma: Use the ‘Pull Translations’ tab to select your project and language. This action will create a new page in Figma with all texts translated into the selected language.
Support
Contact us through email: info@translized.com