Onboarding Guide For Translators
Getting Started
Upon receiving your invitation email, log into the application by visiting this link: https://app.translized.com/login
Once you log in, you are ready to start translating, no further configuration is required on your end. You’ll notice that you have 2 sections:
- Your Projects
- Invited Projects
If you want to start a project on your own, feel free to do so and explore the tool. Please note that you will be the Owner of that project, and this is in no way associated with the project you have been invited to.
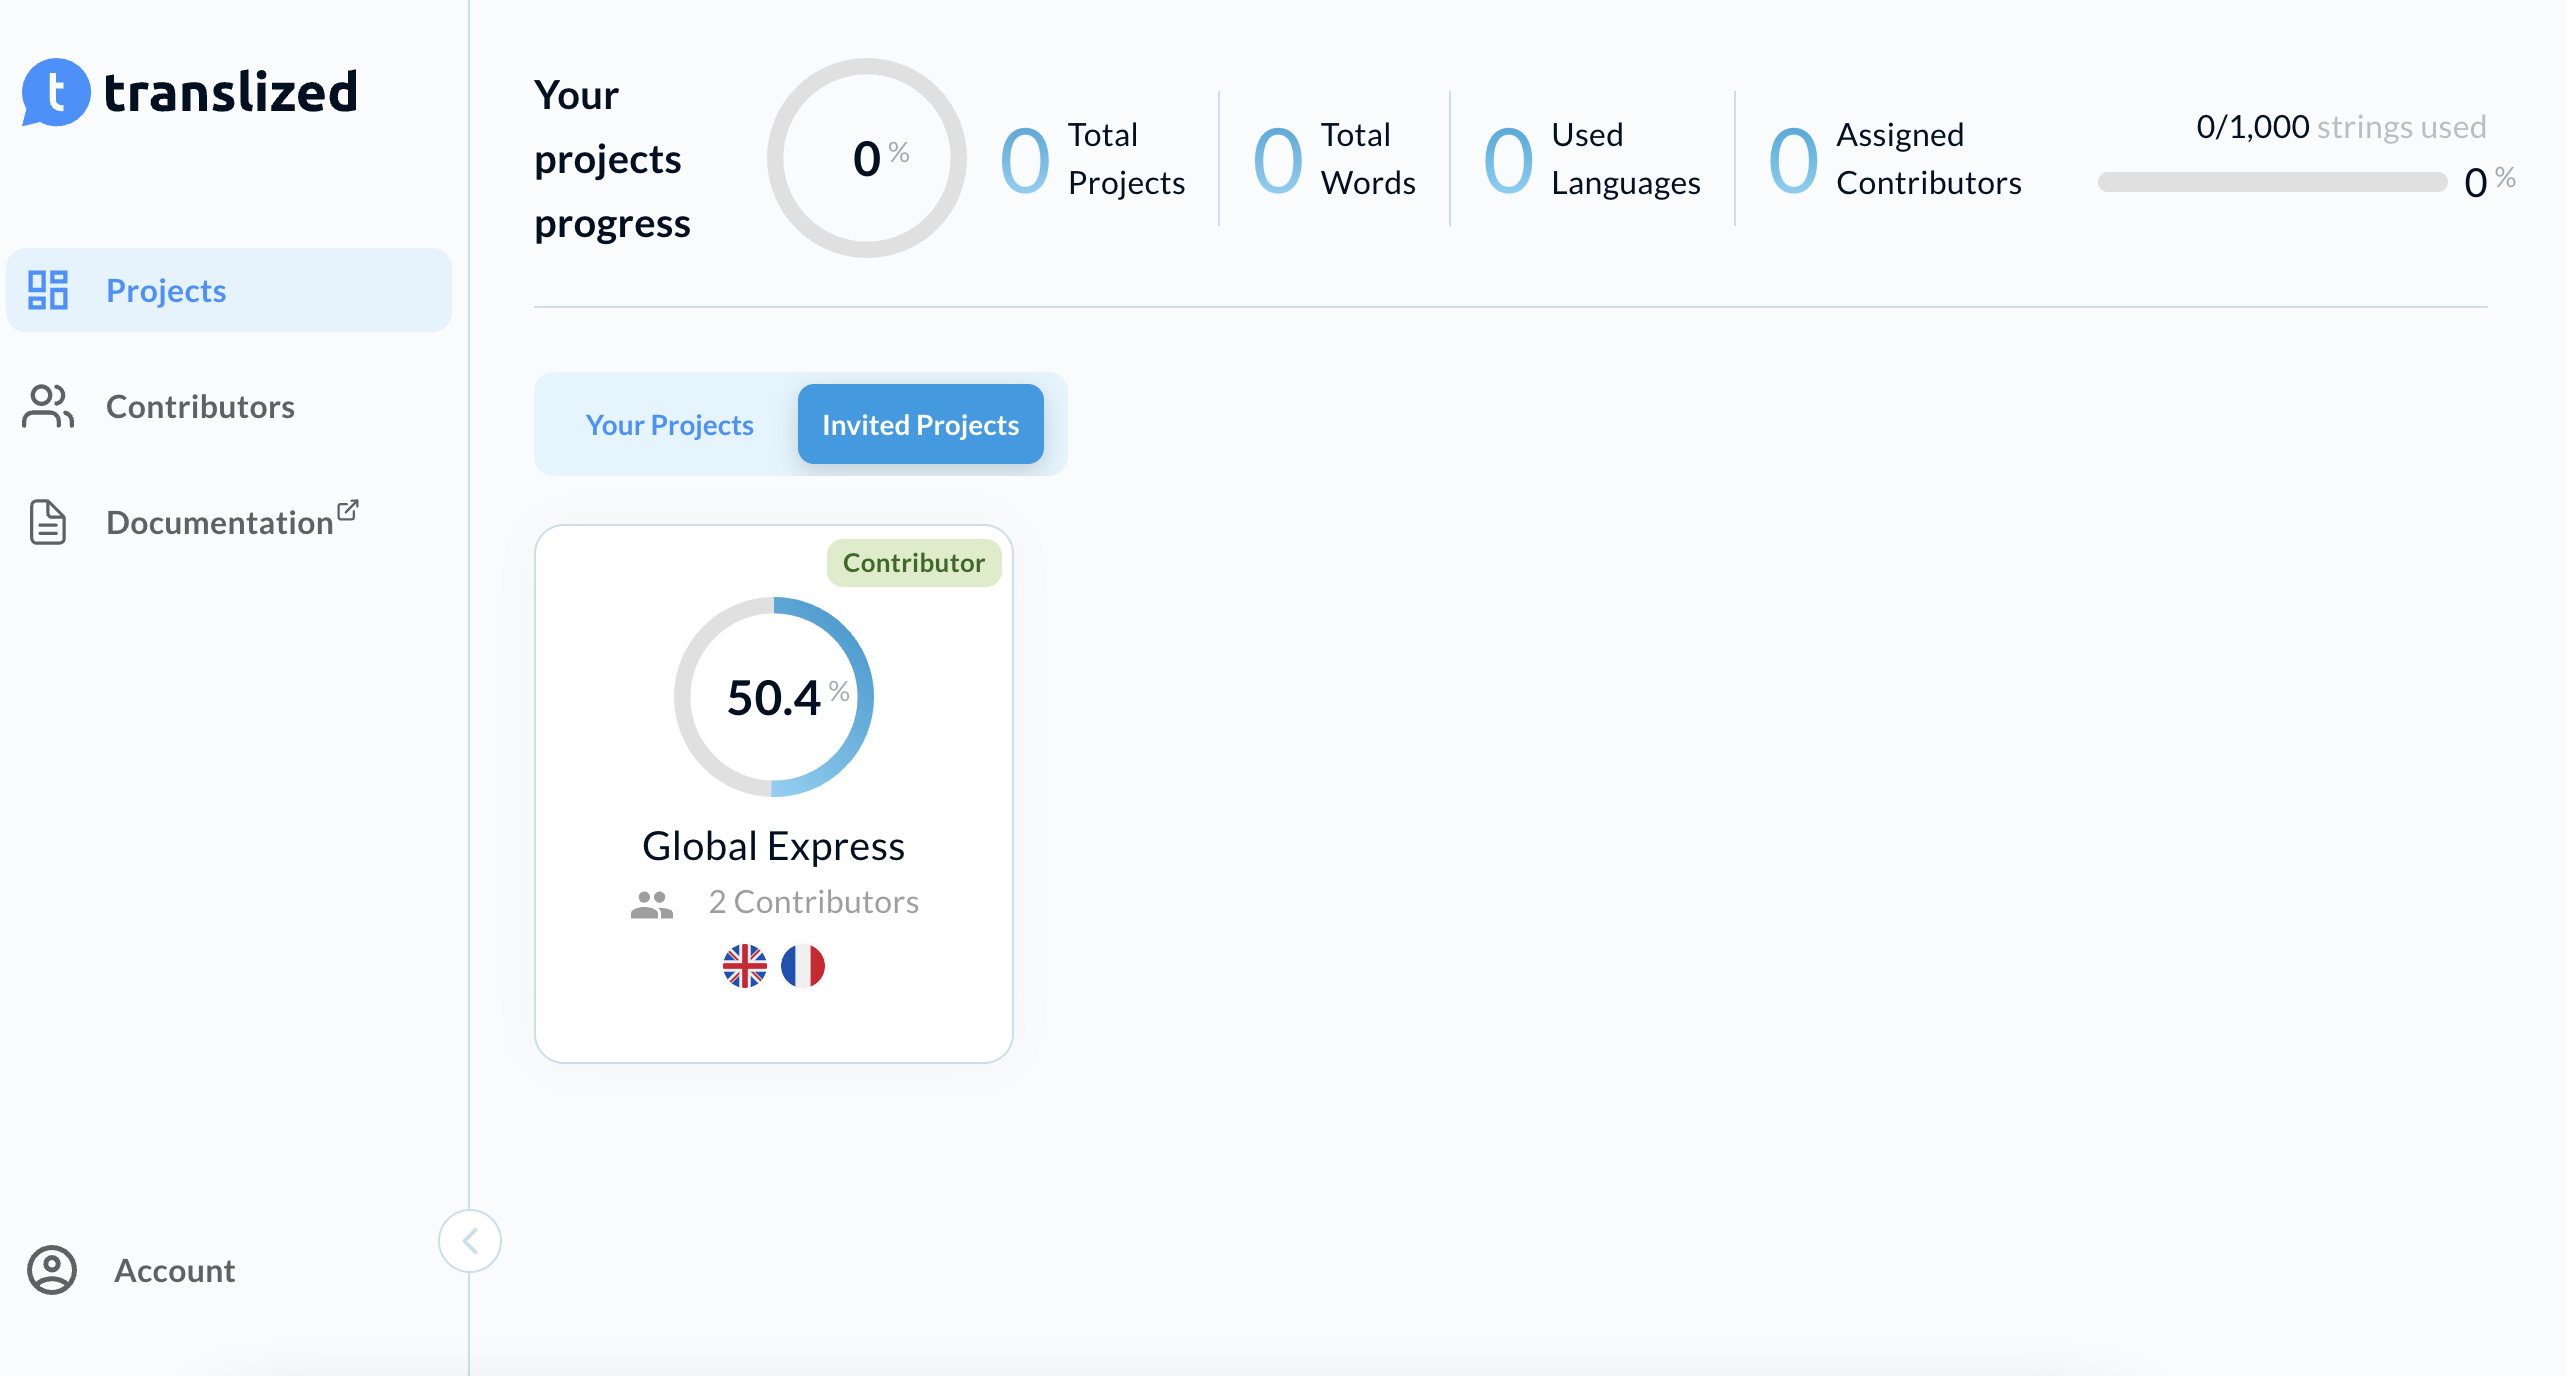
Access Projects
To access the project you have been invited to, go to the invited projects section and choose the one you want to start working on.
This is the page you will land on. You will have an overview of all the languages you’ve been assigned to so you can add your translation or make changes to already translated text.
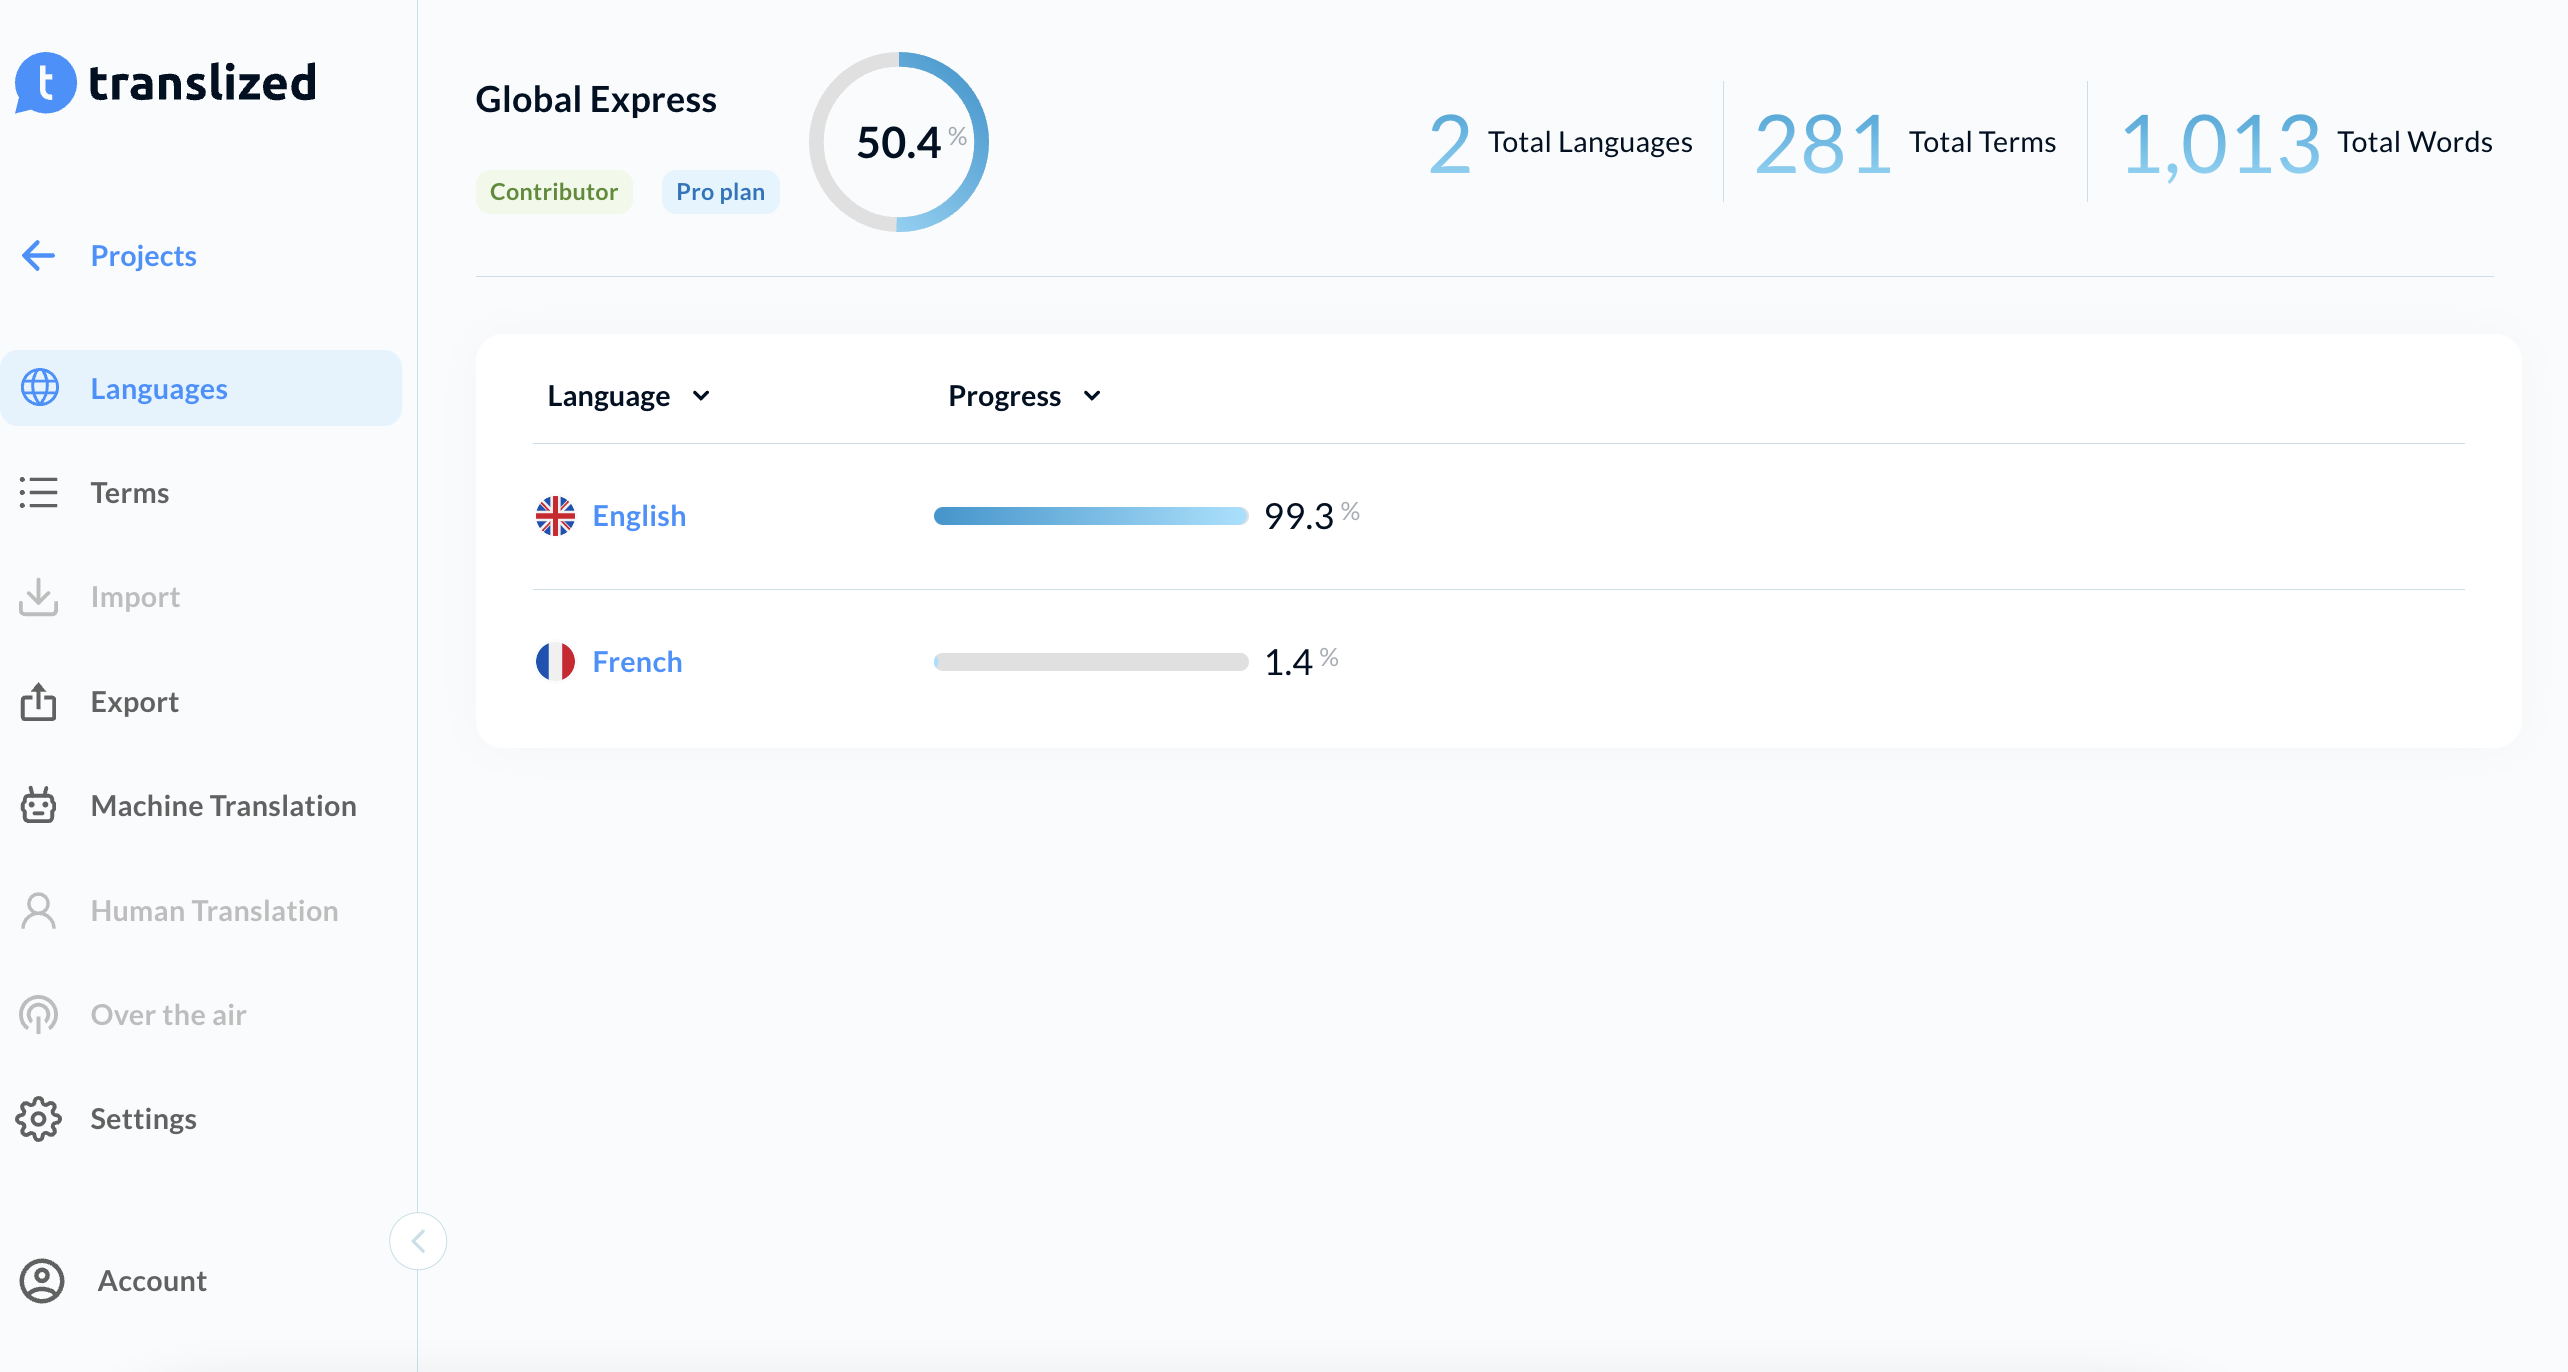
Translate Keys
You have access to the Languages and Keys tabs, where you can manage your translations.
Through the Languages tab, you can focus on each language individually and translate one at a time.
This is what the tab will look like once you land on it. On the left hand side you can see the primary language, and on the right hand side you can add your translation.
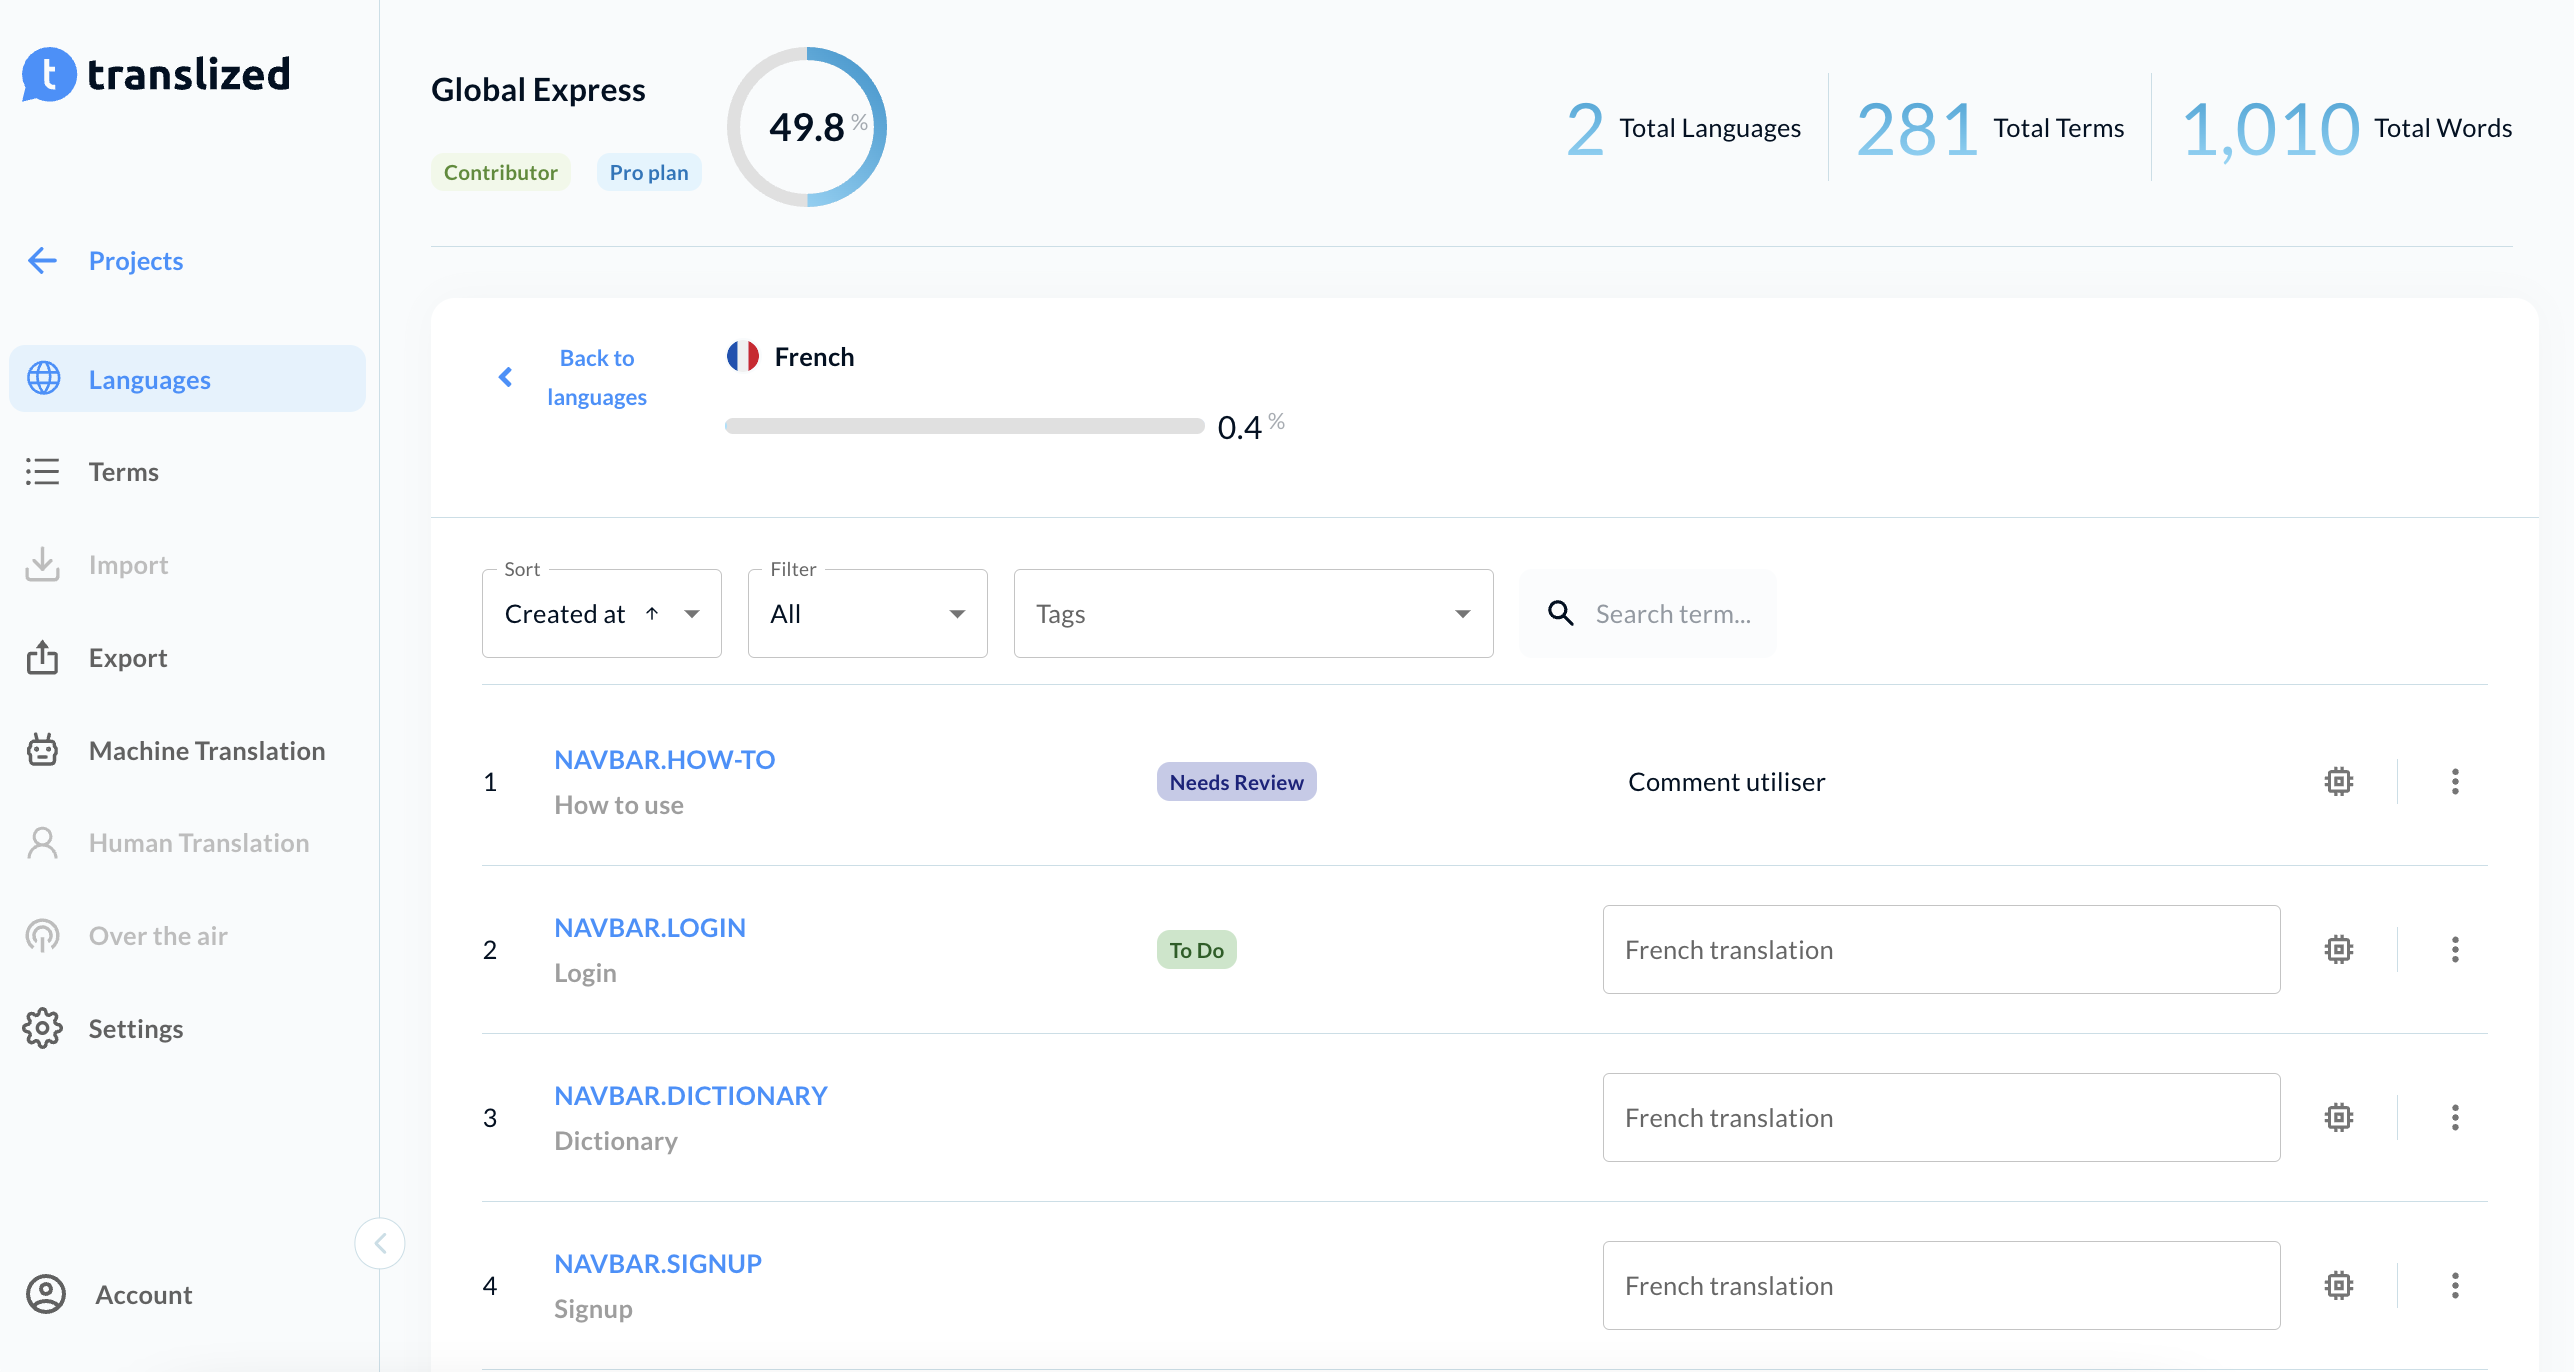
Before you get started with your translation, here are a few features that can help you along the way.
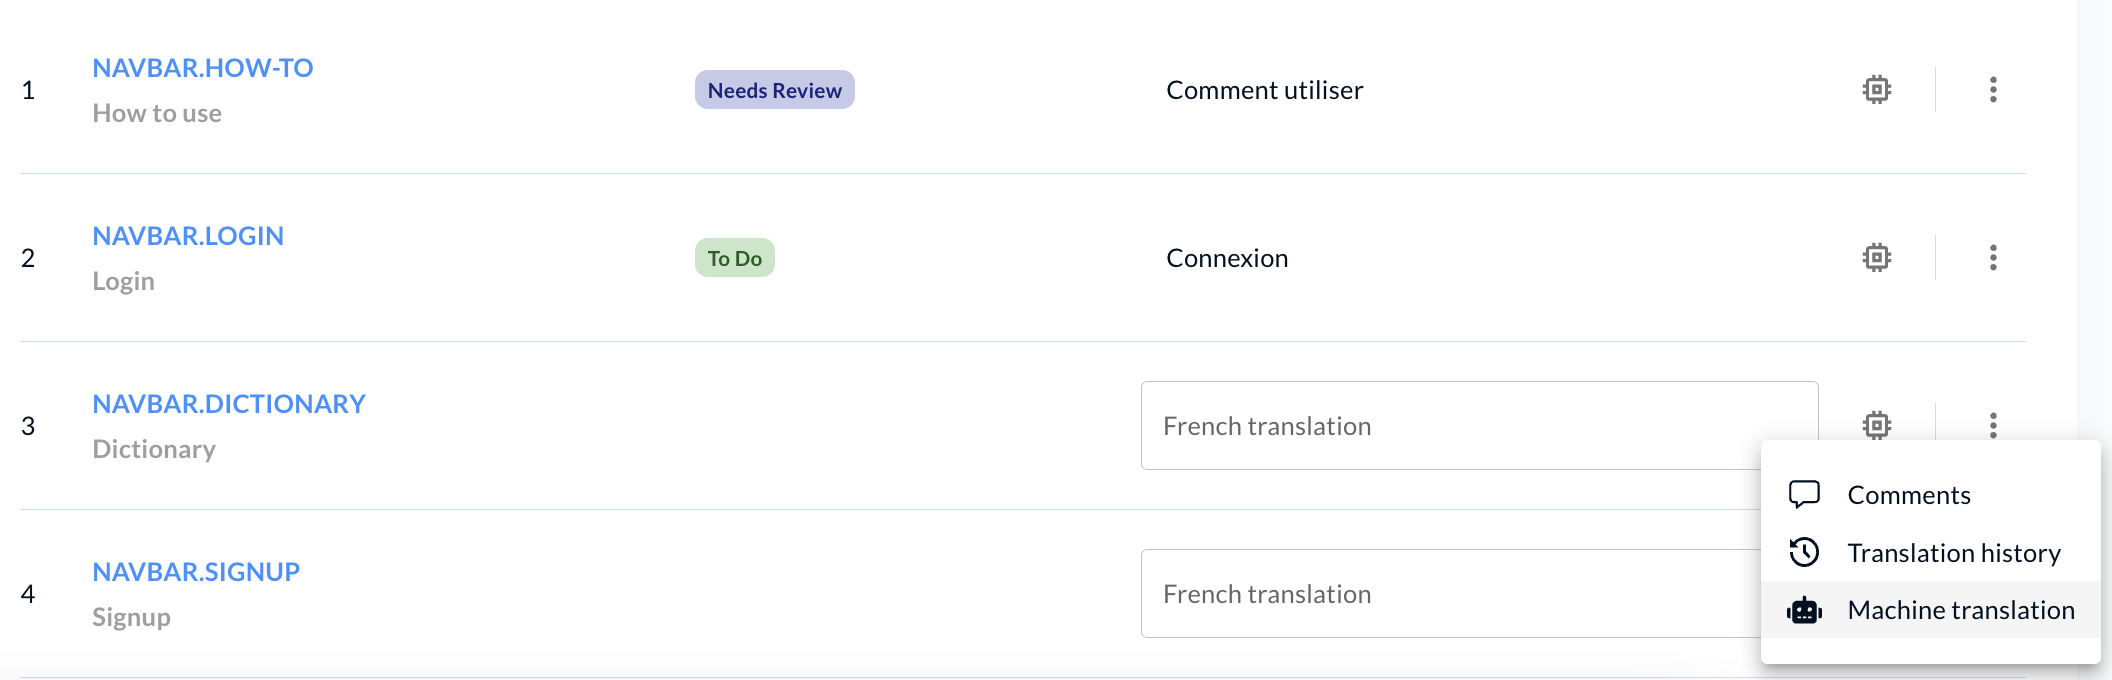
- Key Tags
Key tags are created by Project Admins to give more context about each Key (for example: to do, needs review). Key tags can be found next to the Key you’re translating.
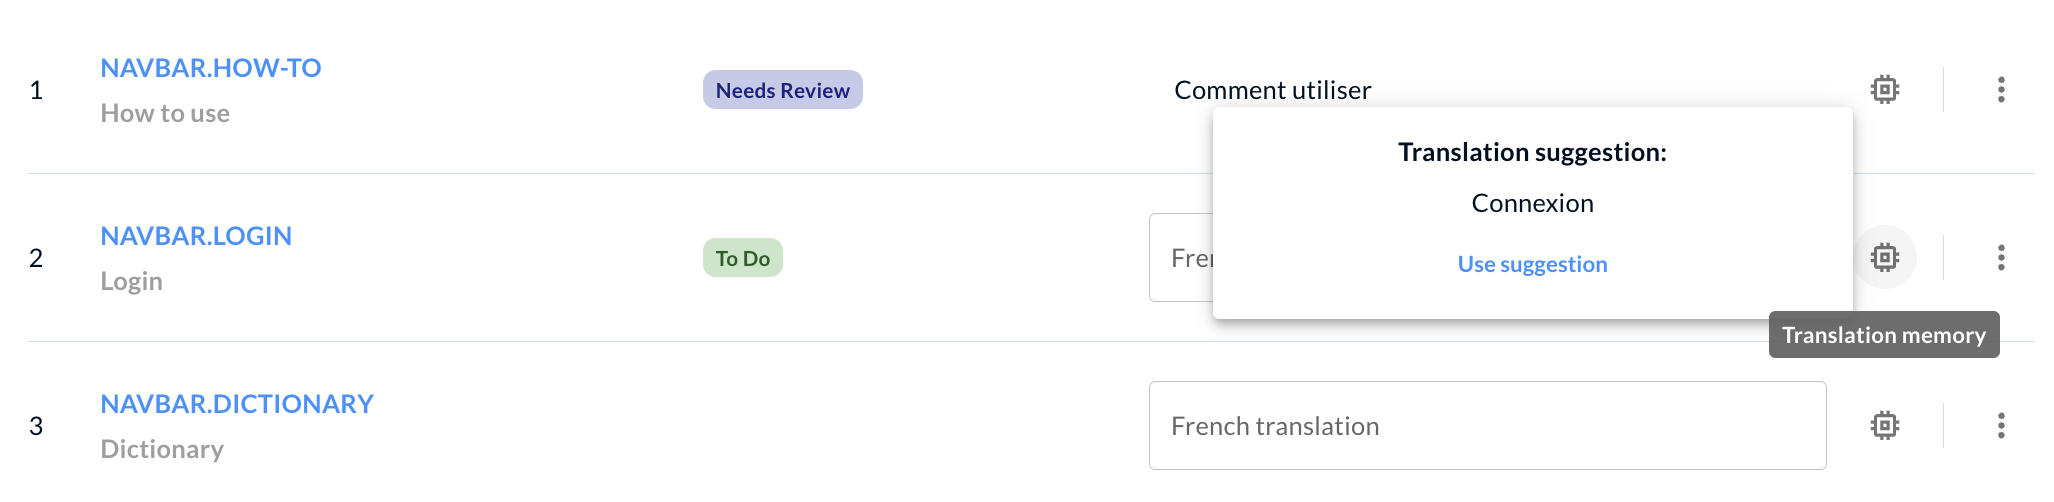
- Translation Memory
Translation Memory helps you reuse text you've already translated, so you do not have to translate the same text multiple times. This option can be found next to the text input field.
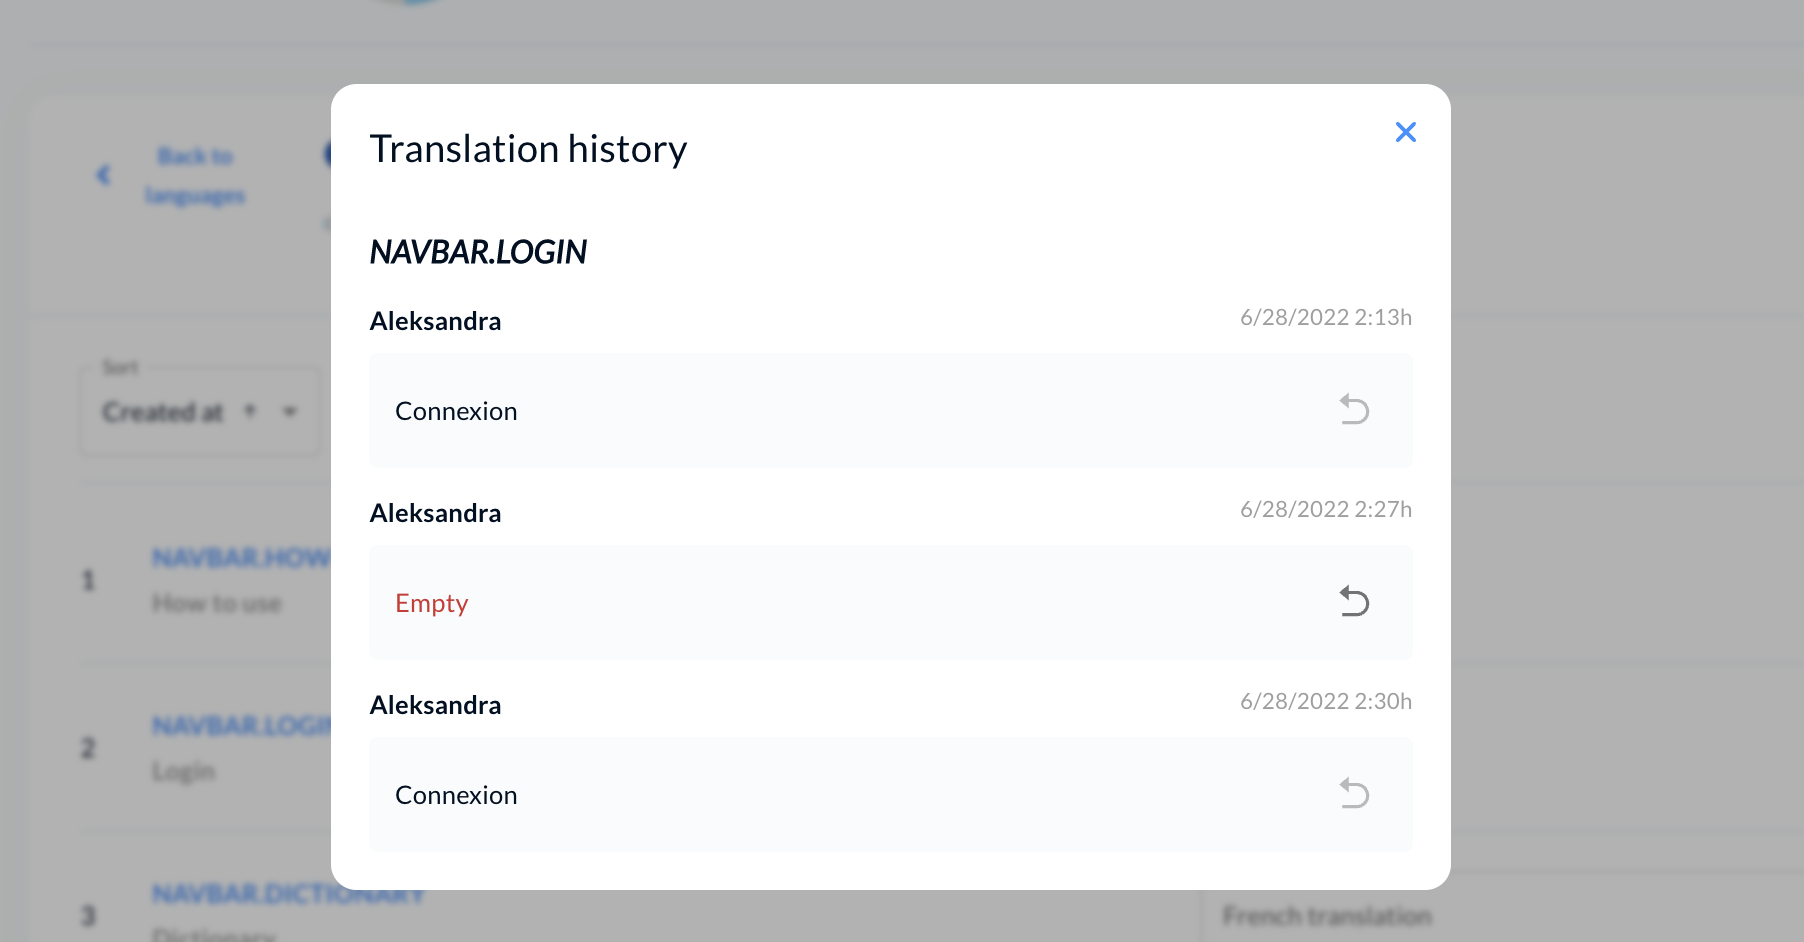
- Translation History
Translation history gives you a full overview of all version changes, and allows you to revert to the previous translation version in a click. Translation history can be found by clicking on the 3 dots on the right hand side.
- Machine Translation
If you need additional help translating, you can utilize the power of machine translation on each key. To reveal this option, click on the 3 dots on the left hand side.
Now that we’ve gone through all of the options you have with each Key, you are ready to start translating.
To translate a certain key, all you have to do is add the translation in the text input field next to the key, and it will be automatically saved. Based on your progress, the progress bar will be updated.
Machine Translation
If you want to get a quick start on your translation with the help of machine translation, you can do that one by one, as shown in the example above.
However, you can also translate everything in bulk by visiting the Machine Translation tab on the left hand side.
Once there, choose the language you are translating to and from, and click Translate.
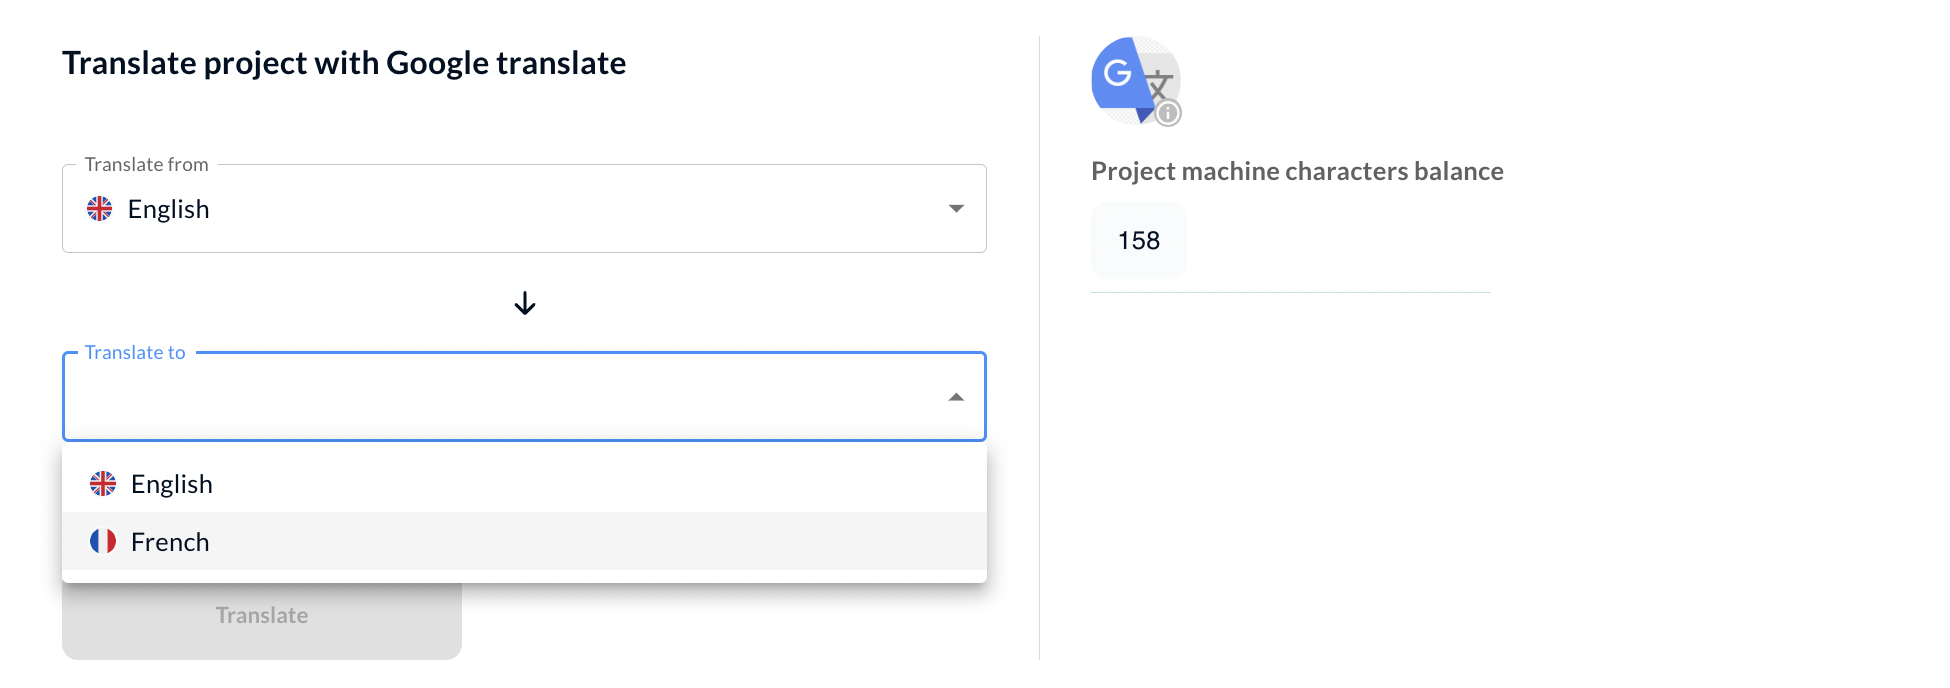
Once done, you can go back to your language and review the translation.
Quick Translate
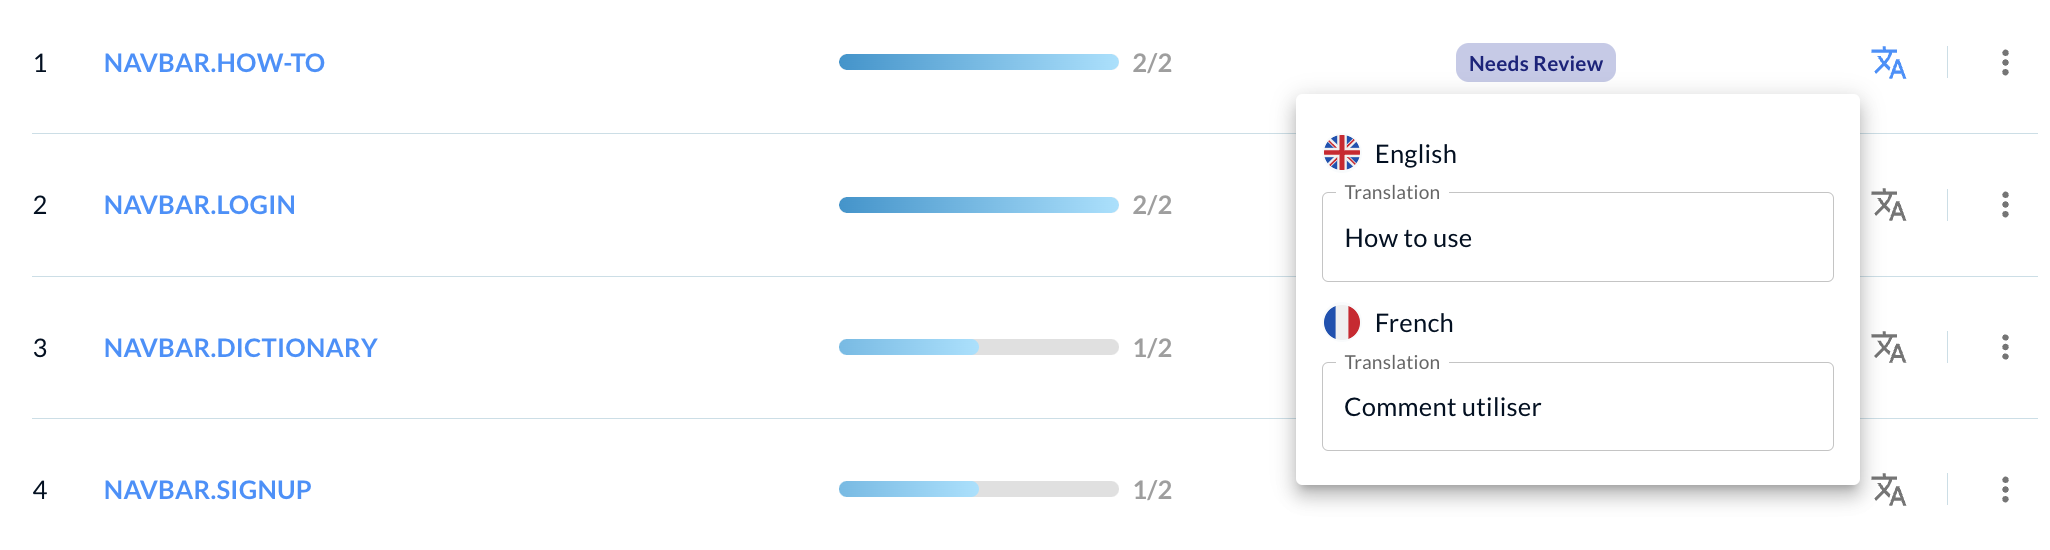
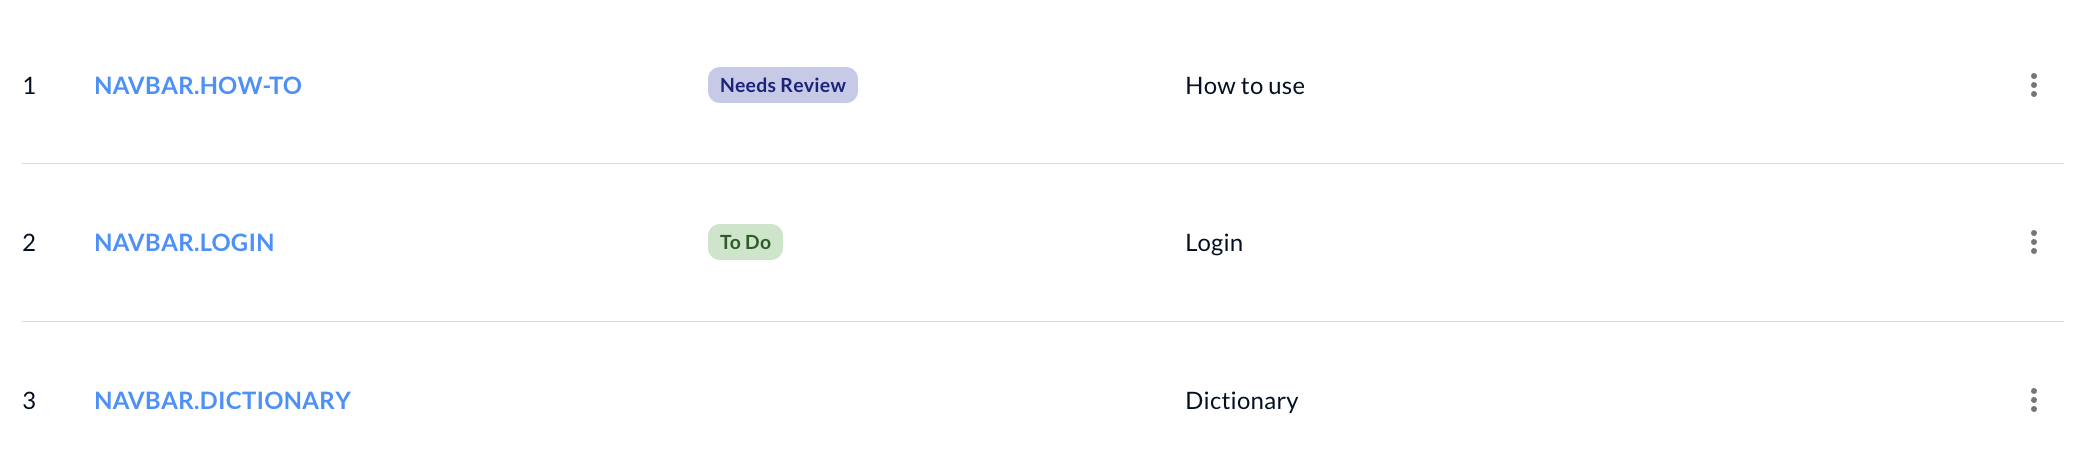
In case you want to review translations for multiple languages, or are looking for a way to quickly update translations for each language, you can use the Keys tab.
On the right hand side of each Key, you have the option for Quick Translate. Once you click on it, a tab will open with all translations which you can then easily review or update.
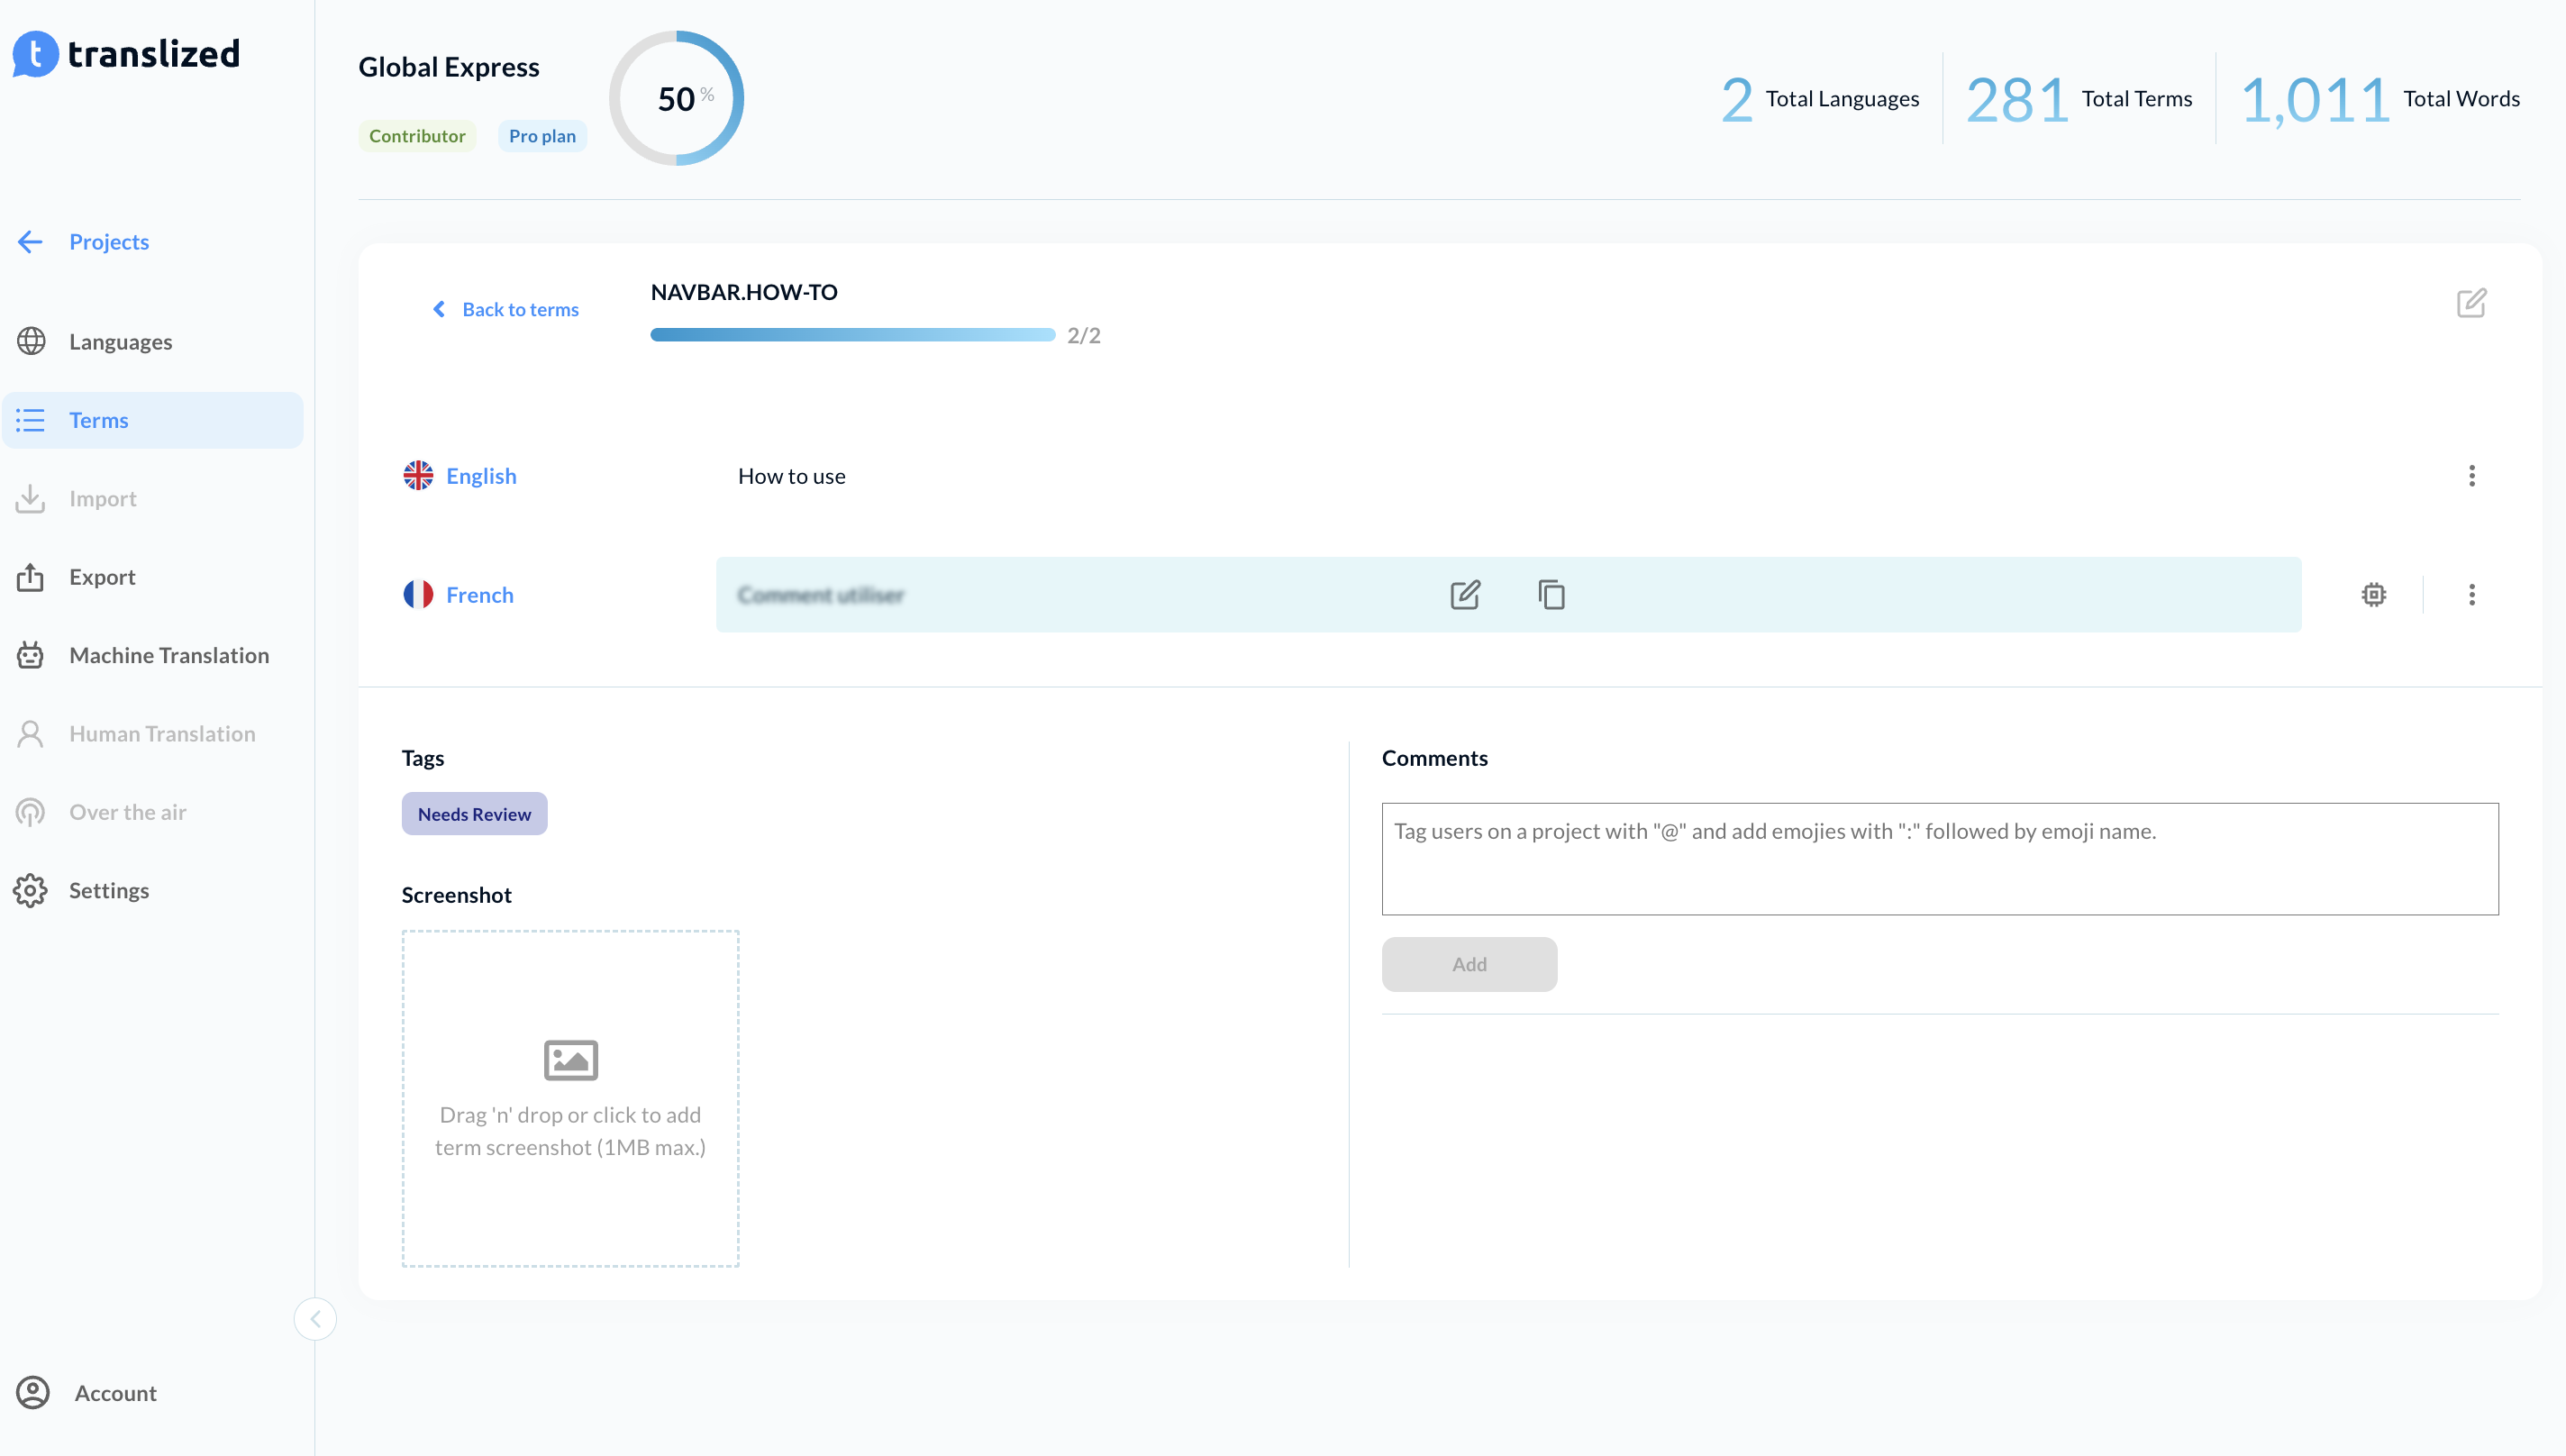
Key Overview
You have the option to view and update each Key individually as well. To enter this view, click on the Key you want (you can access this view from both Languages and Keys tabs).
This is what you will land on once you click on a specific key.
In addition to reviewing and updating the translations from here, you also have the option to add contextual screenshots. If the screenshot has been previously added by another team member, you will be able to view it here.
Communication
Communication is crucial for successful localization, and that’s why we’ve added several options you can use to communicate with your team members.
- Comments
Each Key can be commented on, so you can update your team members of what the status is, or ask for feedback/questions. Additionally, you can add comments to provide further guidance for other team members.
- Mentions
Mention other team members in comments for faster and easier collaboration. Once you mention a team member, they will receive an email informing them of your comment so they can view it as soon as possible.

- Key Tags
Key tags are added by Admins, and can provide additional guidance for certain Keys.
- Screenshots
Screenshots are a great way to offer additional guidance on where a certain Key will be used, and help with translations.
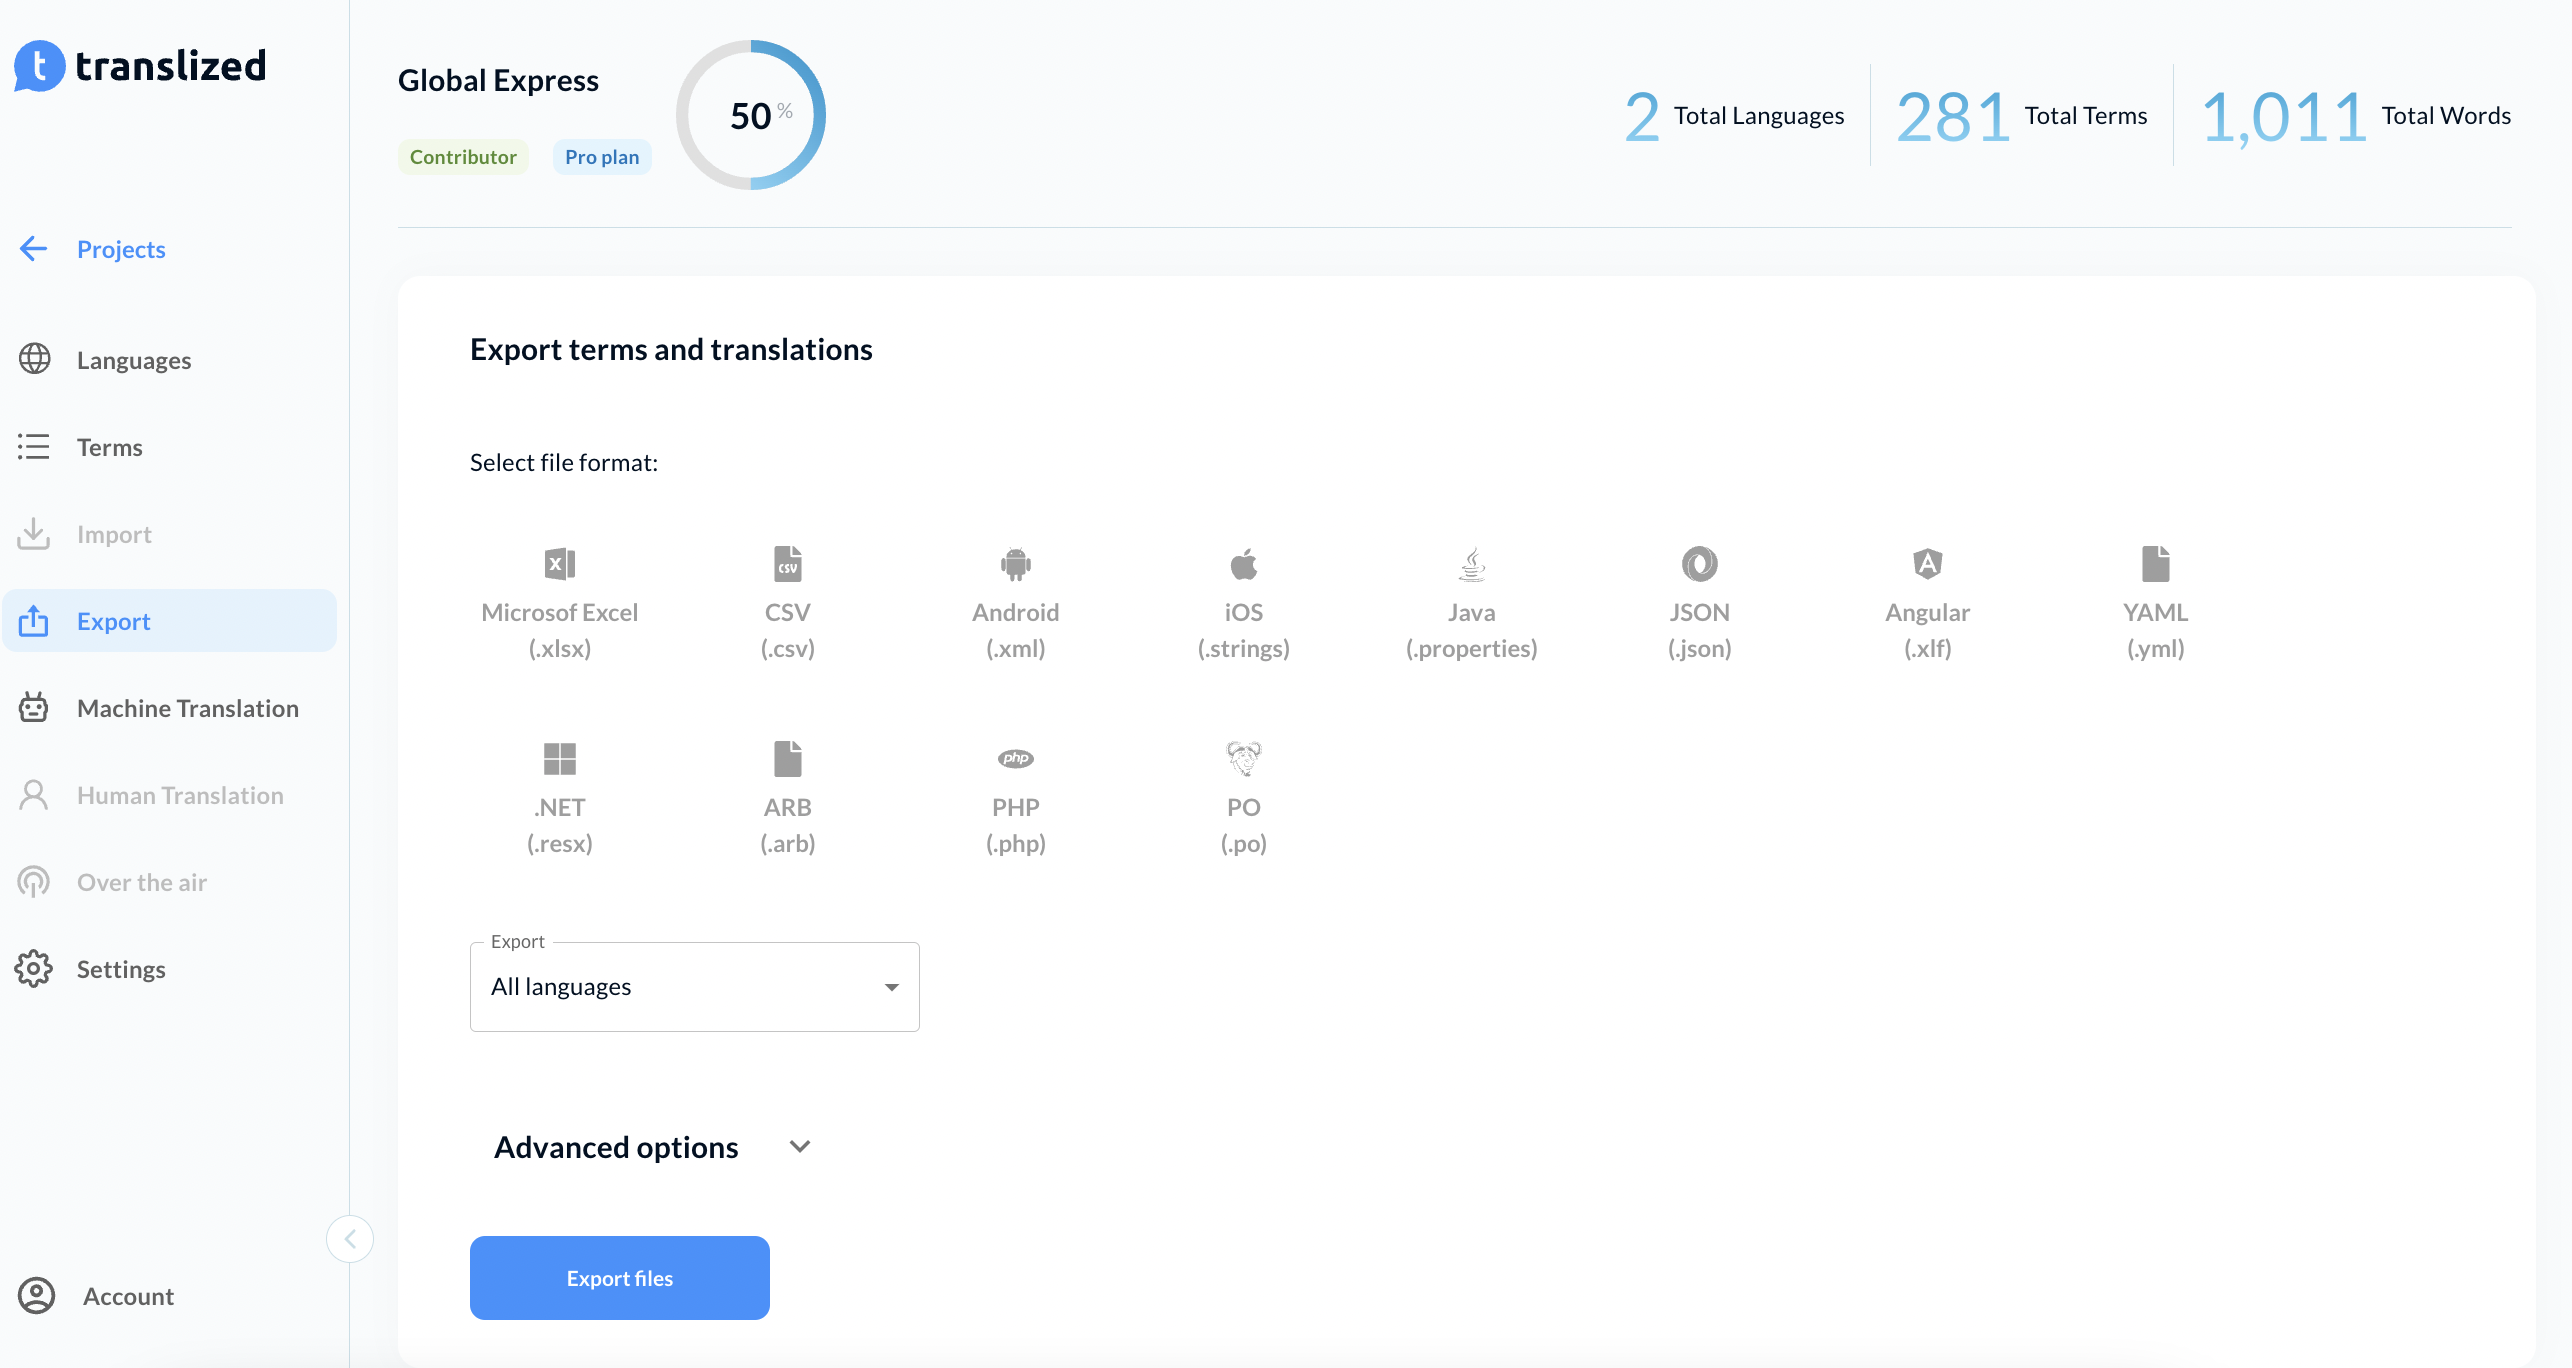
Export Translation
Once your translation is ready, you can easily export it in the 12 file formats supported by Translized.
Visit the Export tab on the left hand side, select the file format and language you want, and you’re good to go.
You have the additional option of adding a custom file name and replacing empty translations with primary language translation.
If you want to learn more about Translized, visit our blog which is packed with helpful tips on how to run smooth localization processes: https://www.translized.com/blog or visit our website at: https://www.translized.com/